In this story i will share my docker experience, so, be ready ! to know the most used container technologies in the hole world ! . I will help you to get started in docker also we will deep dive into cool features … , and by the end of this story you will be able to make your own projects using docker and docker-compose 😅. The second part is ready : hello docker part II
What is Docker ?
In a simple way … Docker is a way to bundle an app and it’s requirements into a single Image that can be runnable in any environment like Windows, Linux, Mac os and of course the cloud.
A docker Image is a micro os like ubuntu, debian and archlinux …, But what is a micro os ? simply it’s a very tiny os that contains only a file system and some basic command and of course a package manager like apt and pacman …
What i need to get started ?
I am not going through the installation process or explaining the functional part of docker … i will go through examples from real life and some cool tips and tricks .
- Docker installation : Clik here
- Docker vs virtual machine : Click here
You must READ them 😠
Check your docker status by running this command :
$ sudo systemctl status docker
If docker is not running make sure to run this command
$ sudo systemctl start docker
Running your first container
After installing docker, now you are able to follow this article, so … let’s run our first container by running this command and i will explain every step 😃
$ docker run hello-world
This is the output :


By this command we tell the docker engine to run an image called “hello-world”, which is an image that contains a simple script with the output that begins with “ Hello from docker …” so … what happens here ?
The docker engine searches for this image in the local registry but he tells us that he didn’t find it so it goes to a global registry which is a huge and public place for free images (created by other peoples ) called docker hub.
He pull or download the image then he run it, and finally we get the message or the execution result of the script inside the image. To download only the image we use ’’docker pull hello-world’’.
Let’s try another one , in this case i have an ARCHLINUX based os and i want to run an alpine system with docker and make some work on it so let’s go 😄
docker pull alpine:latest
docker run -it alpine sh
Output :

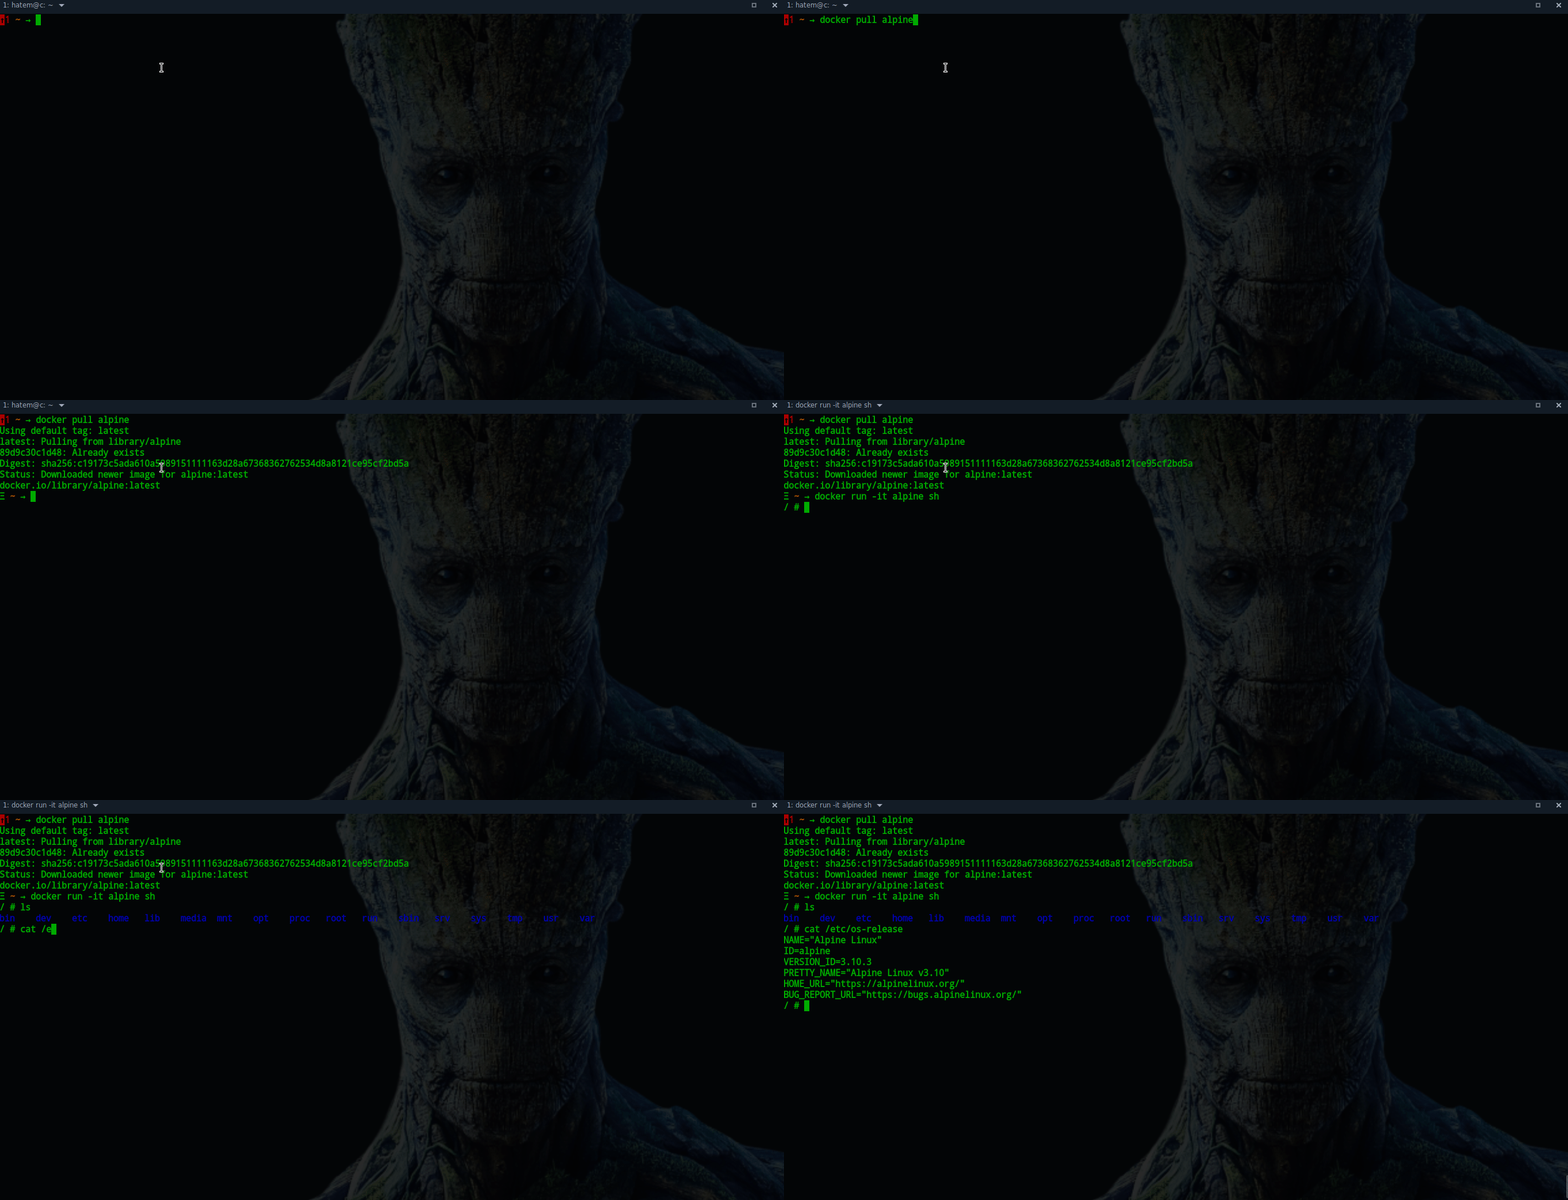
We have downloaded the alpine image and we run it interactively by adding “ -it” and “sh” at the end :
- -i : for the interactive mode with
-toption ( we can give input and type some commands to interact with the alpine system) - -t : Allocate a pseudo-TTY (PTY) to emulate a hardware terminal we used often with ssh and telnet protocols .
- sh : is the default shell ( like bash, csh and zsh …)
The other commands ( ls , cat …) are a basic commands that are founded on any other Linux systems.
Commit a docker container
What is the difference between a docker image and a container ? Simply the docker image is the basic resource and it can be shared by multiple containers but how ? when we make a “docker run” , the docker engine make a snapshot or a copy of the base image in the memory and we use it like we did with alpine ,after some work on the snapshot or the container we usually stop and exit the container, and every container is identified with a unique hash (ID),
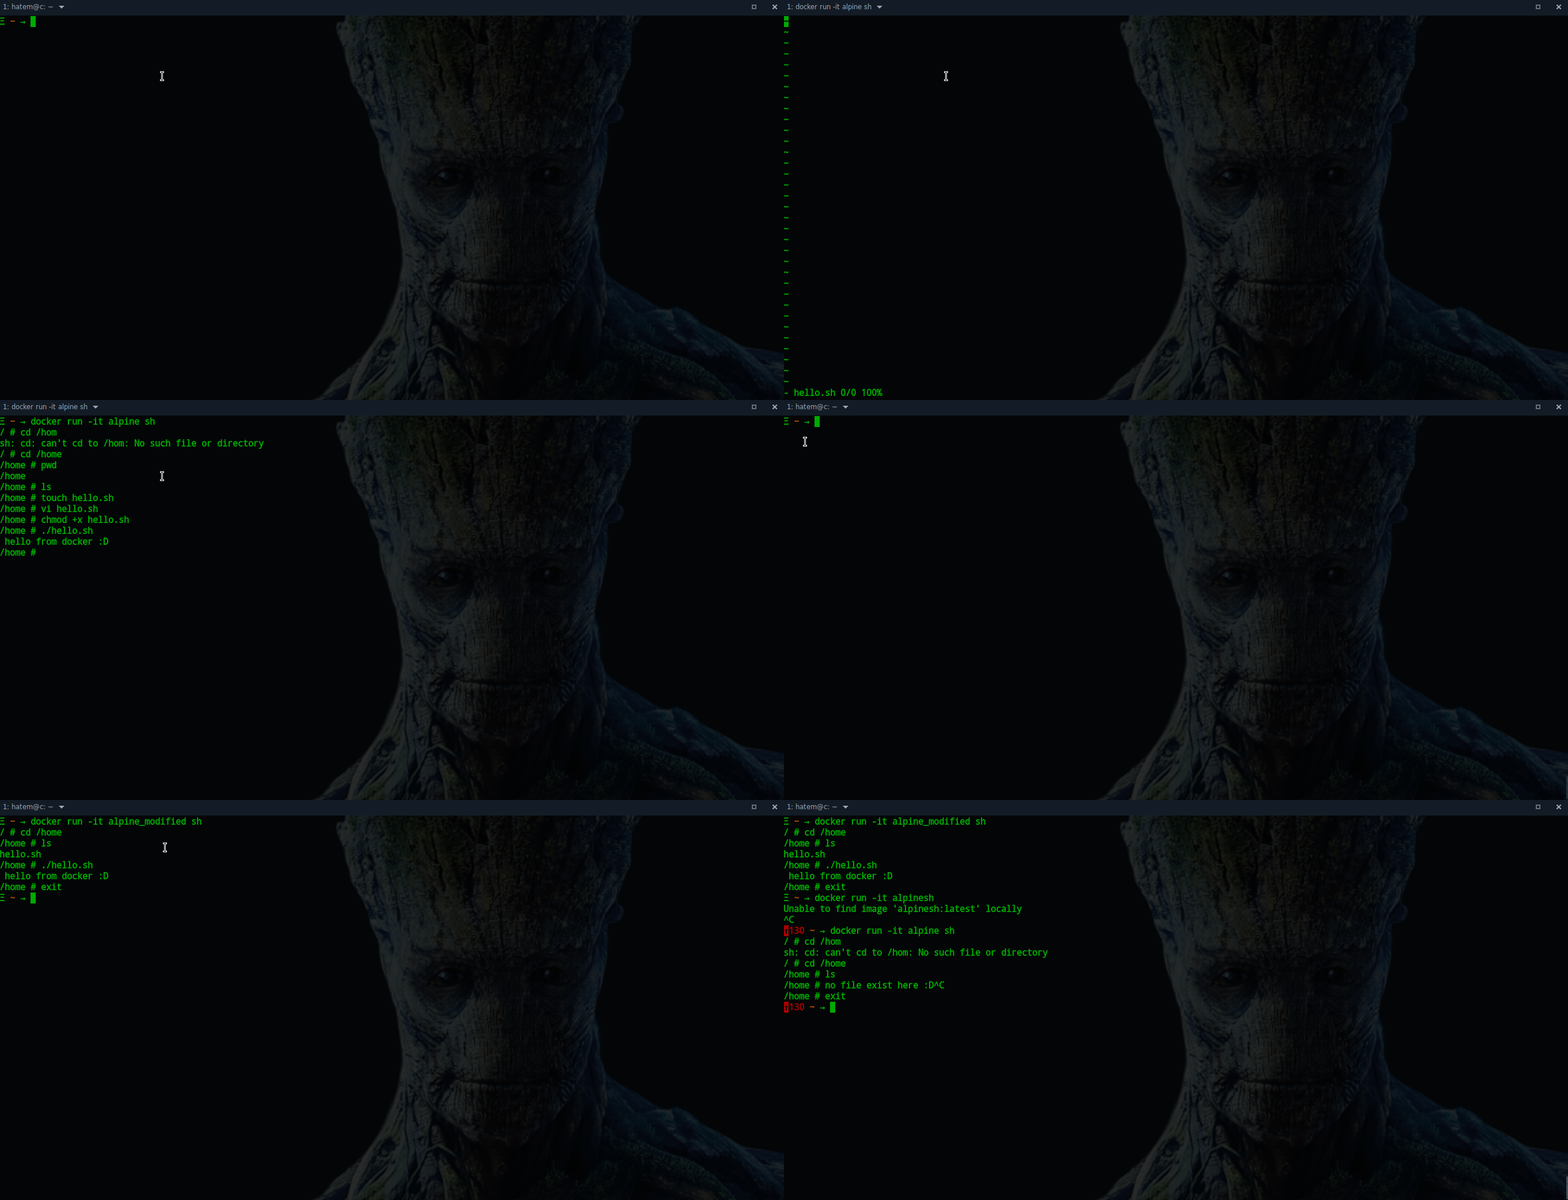
To add the changes that we make on the snapshot to the base image we use the “commit” command to persist our changes so let’s try out :
Watch this demo :

docker commit
We have created a new image named “_alpinemodified” that contains a “hello.sh” fileunder the “/home” folder . You surely notice that the original modification in the alpine image is gone now.
Create your own image
Another way to save changes or create some stuff in containers is the “Dockerfile” , which is a a set of instructions that define the final state of your image .
This file uses YAML syntax which is easy to understand and so clean 😄, so let’s go writing our first Dockerfile :
dockerfile
In this file we have two keywords :
- FROM : this is the base image that we use .
- CMD : the Command keyword , this command will run the “echo hello” when we use the “docker run “.
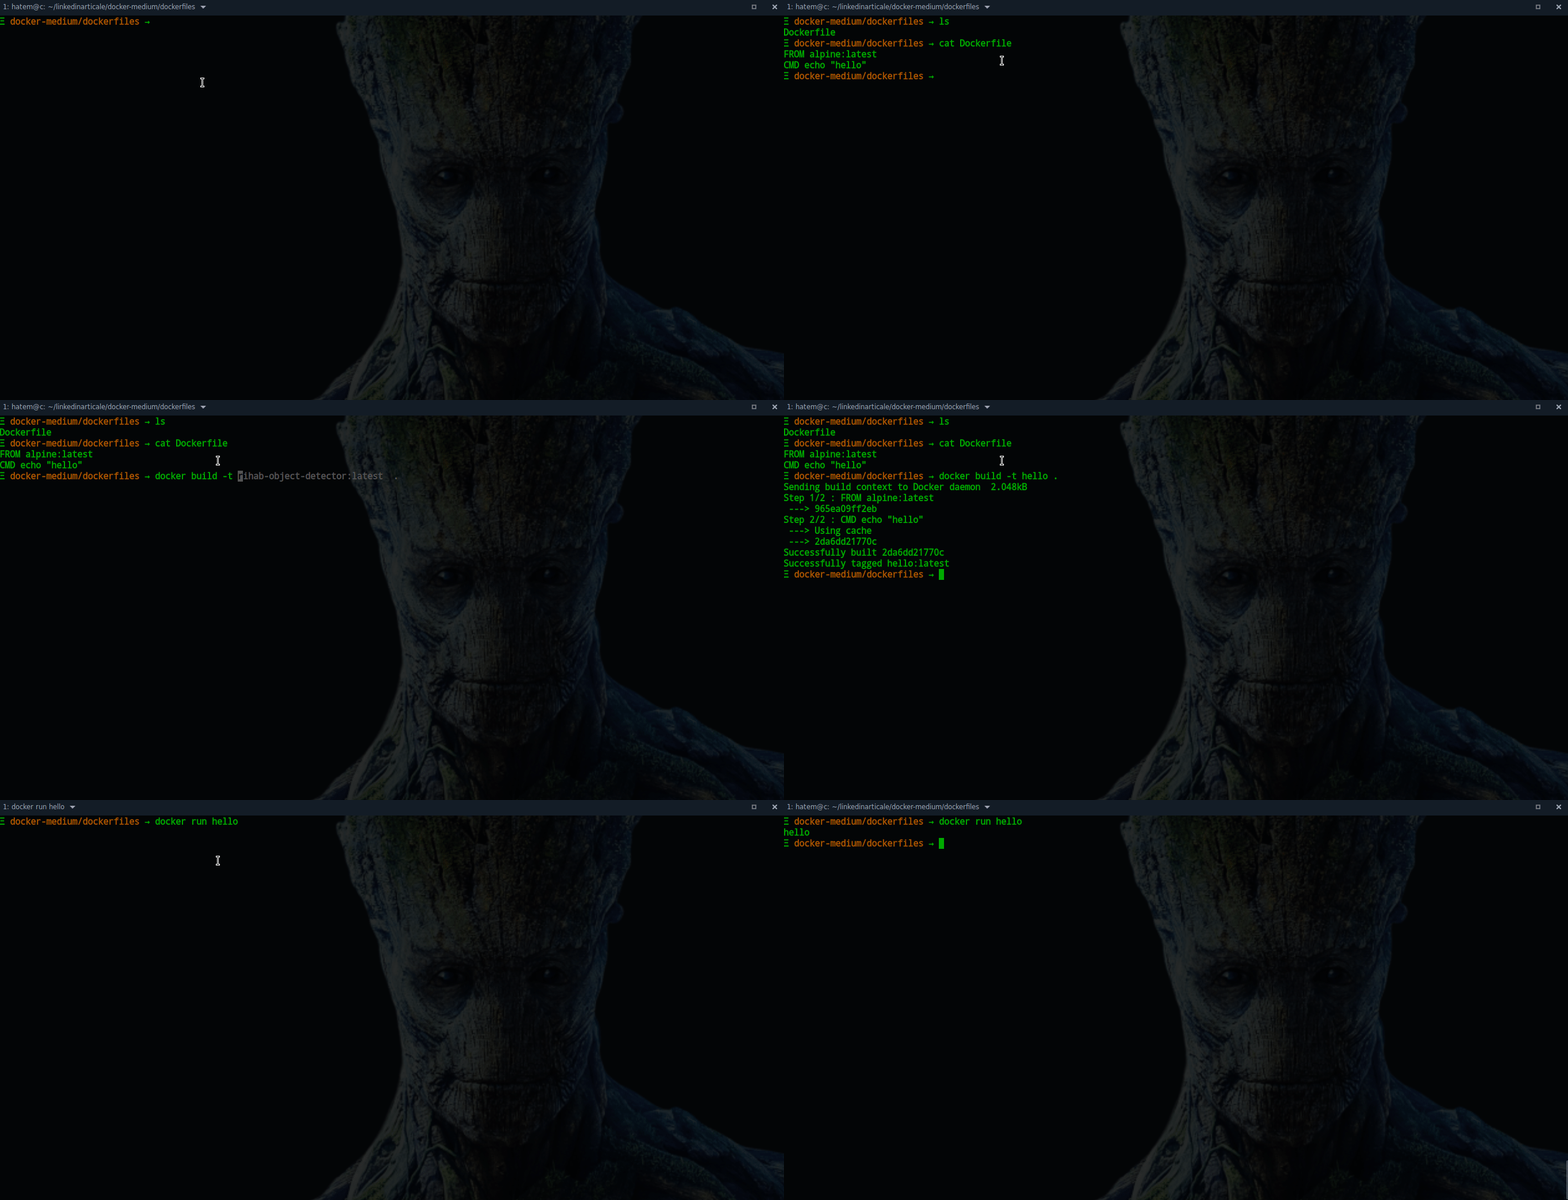
let’s build the image :
$ docker build -t hello .
- build : will make the build process by executing every instruction (step)
- -t : giving a name to our image
- . : our build context which we have the “Dockerfile”, or you can specify the hole path.
note: don’t forget the dot “.” please !!
Watch the demo :
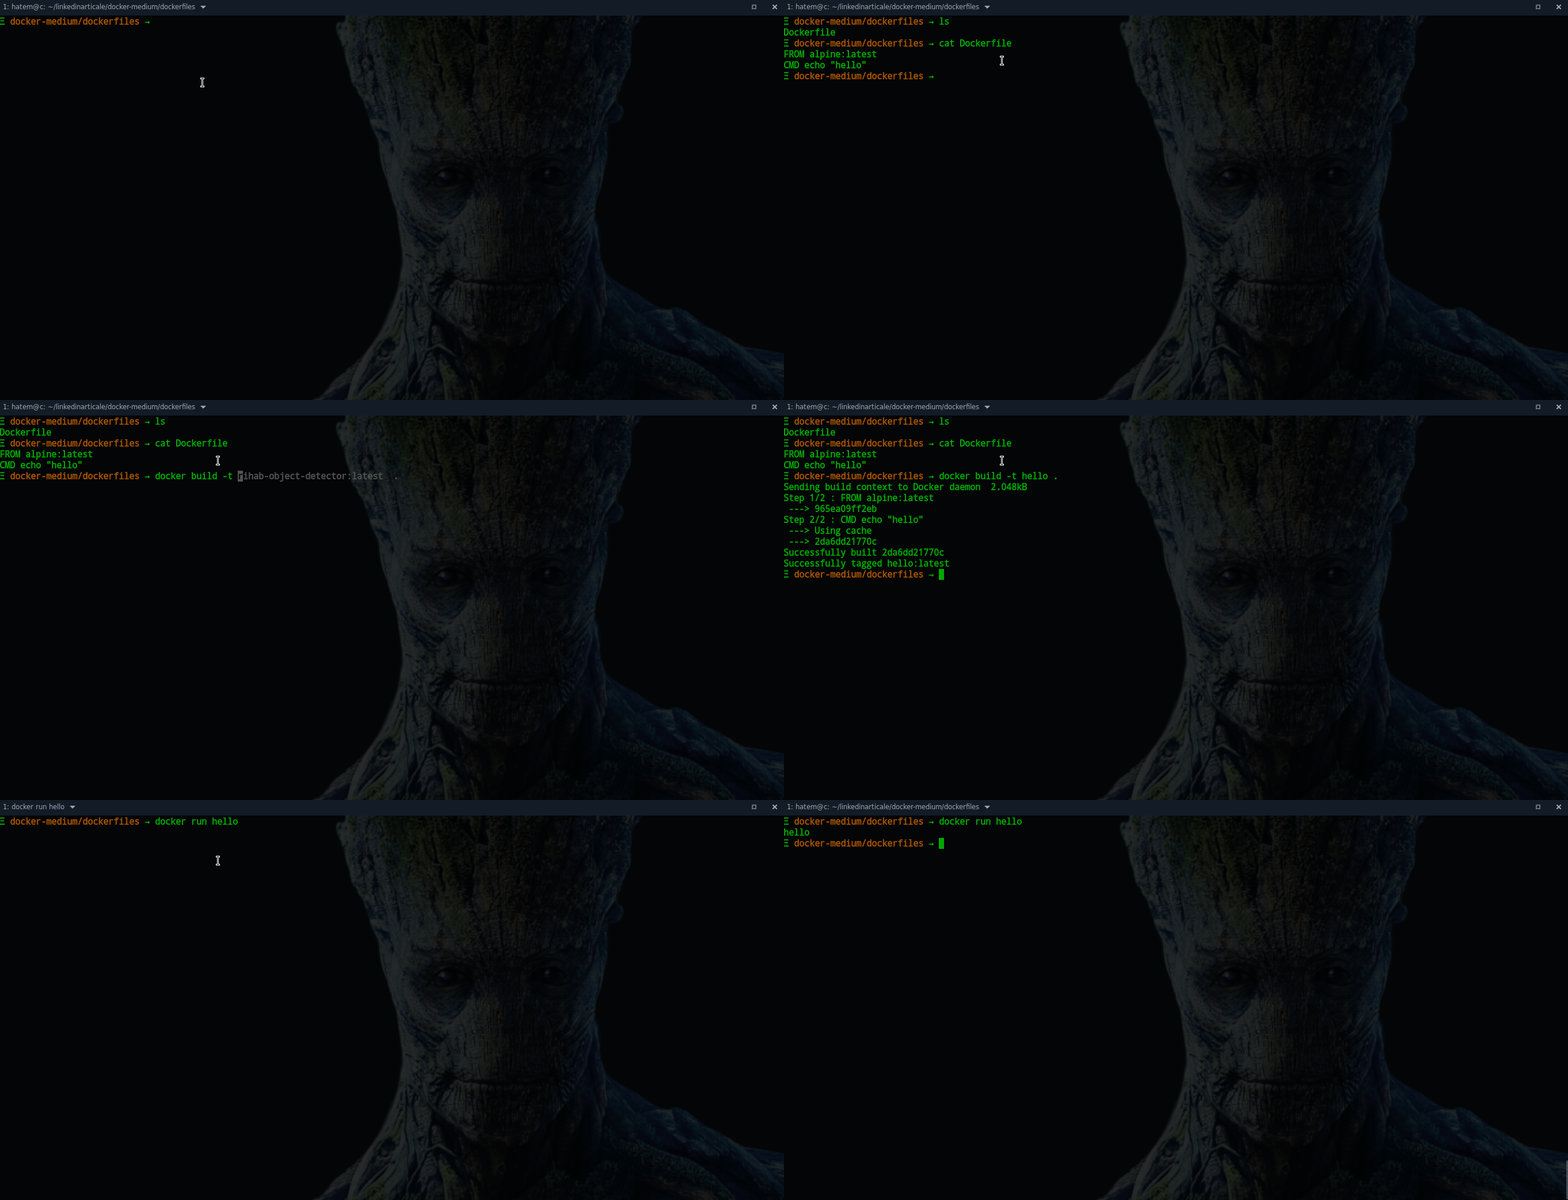
hello_alpine
To get all images try to run : docker images , if you want to get more information about your image run this command : docker inspect hello and try to figure out what happens here , i will cover this topic in the next stories … .
Finally, this tutorial is just an introduction to docker for beginners, in the next parts i will talk about more advanced features in docker. If you have feedback feel free to share them with me Hatem Ben Tayeb.
If this post was helpful click the clap button as much as possible 😃. The second part is ready : Learn Docker From Scratch
